Saturday, December 14, 2013

Slow Cooker Pot Roast


Well school has sure been fun this semester, covered in rainbows and sprinkled with glitter.  Been awhile since I updated this blog, since most of my free time this semester consisted of eating dessert in bed and crying over it while watching Netflix, avoiding school projects and responsibility. That's college summed up in a nutshell. Made it to finals, so now I'm procrastinating on doing a take-home test so that I can tell you about some pot roast!

I wanted to make a meal that would leave me lots of leftovers to fuel me during finals next week. And since I'm a lazy ass, I wanted to something that I could throw in the Crock-pot to cook while I was at work. There are a billion ways to make pot roast, and since it is so versatile, you can add more/less ingredients without the pot roast gods getting angry. Everyone seems to have a way of cooking pot roast he or she likes best, so alter the spices/ingredients based on your preferences.


Ingredients: 2 - 2.5 lb chuck roast, little potatoes cut in half, (I used 12 red and 3 gold ones, but the exact number/proportion doesn't really matter), 1 yellow onion cut into wedges, a bulb of garlic peeled and diced (I like garlic, so use less if you're not insanely obsessed with it), 20 pearl onions (again, use as many or as few as you want-or skip them and add an extra yellow onion instead), 5 carrots cut into chunks, 1 cup beef broth, and enough rosemary/thyme/salt/pepper to coat the roast.


Begin by securing yourself a good 'ol chunk of cow. I chose a cheap chuck roast. A sticker on the package labeled it as a roast meant for the oven, but using my Crock-pot did not make me go up in flames, so use whatever your little heart desires. F*** you, meat stickers, you don't tell me what to do.

The night before you're planning on making your roast, rub all sides of it with enough salt to make your doctor cry. Sprinkle a decent amount of pepper, dried thyme, and dried rosemary all over it as well.   Might seem like too much, but these spices are going to be flavoring your vegetables too, so don't skimp. Place the meat in a ziplock bag and leave in the fridge overnight. 


Put your roast on the bottom of the Crock-pot, then add the sliced potatoes.


Next, sear your vegetables. In theme of the whole pot roast flexibility concept, this step is something you can skip, but I think it helps add flavor. I warmed about 3 tbs of oil in a medium pan, then added 2 tbs of butter (I am a fat kid at heart). Turn the heat to medium high.


Take your onion wedges and toss them into the hot oil/butter. Since they're going to be sitting in the Crock-pot for hours, you don't need to cook them in the pan very long, just a few minutes to get a little color on the edges. I cooked them longer than I needed to. Make sure and flip them a couple times so they don't burn. Then, using a spatula, take them out of the pan and place on top of the potatoes in the Crock-pot. Leave the leftover oil/butter in the pan.


Throw in your carrot chunks and pearl onions and sear those for a few minutes. Except, don't throw them hard, or else you will have little onion bouncy balls going everywhere, while butter/oil splatters everywhere. I speak in theory, of course.

So on second thought, don't throw them at all. Be gentle with them. Treat your pearl onions and carrots like sleeping babies as you gently slide them onto the pan without waking them up. 

*Disclaimer: No, I don't cook babies. My pre-finals brain is confused and doesn't know how to simile. Don't judge me, plzkthanks.


Once those start to get a little color, toss in the garlic. Turn down the heat to medium and mix everything often, because the garlic will brown quickly.


Once the garlic has browned, toss all this goodness into the Crock-pot. I stirred the vegetables to get them more evenly spaced out.


Lastly, add your cup of beef broth. I used a little more than a cup since I can't follow exact measurements. I have a problem with recipe authority.


Let's all take a moment to appreciate my narrow escape from adding coffee to the recipe. Make sure the liquid you pour in is beef broth and not the cup of coffee you precariously placed next to it. This isn't a peppermint mocha pot roast, yo.


Turn your Crock-pot on low for 6-7 hours, go about your normal duties, and come home to a hot meal! I ended up leaving mine alone for 8 hours since I couldn't get home right away, but it was still fine. Slow cooked meals make me feel like someone else cooked the meal just for me.


I could barely get the meat out of the Crock-pot without it falling apart. How it should be ;)


Slow Cooker Pot Roast

Ingredients:

2 - 2.5 lb chuck roast
15 small potatoes, cut in half (assortment of red and yellow)
1 yellow onion, cut into wedges
20 pearl onions, peeled
5 carrots, cut into chunks
1 bulb of garlic, peeled and diced (or just use a few cloves)
1 cup beef broth
3 tbs vegetable oil
2 tbs butter
2 tbs dried rosemary
2 tbs dried thyme
Salt/pepper to coat


Directions:

1) Rub rosemary, thyme, salt, and pepper over roast. Place in ziplock bag and let set overnight in the fridge

2) Put roast on the bottom of the Crock-pot, then add potatoes 

3) Warm up oil in a medium pan, then add butter. Turn the heat to medium high

4) Toss yellow onion wedges into the hot oil/butter. Cook them several minutes until seared, flipping as needed.  Place on top of the potatoes in the Crock-pot. Leave the leftover oil/butter in the pan. Place carrot chunks and pearl onions into the pan and sear those for a few minutes. Add a little more oil if you need to. Once those start to get a little color, toss in the garlic. Turn heat to medium and mix everything often. Once garlic has browned, add the vegetables in the Crock-pot.

5) Add beef broth. Cook on low for 6-7 hours, then enjoy!


Thursday, August 29, 2013

Caramel Apple Cheesecake Bars


The weather may be warm, but my mind has leaped ahead to Fall.  I've been suffering from mad cravings to bake with pumpkins, but since they aren't available, I'm making due with other fall style deserts for now.  Figured apples would be a good start, especially when paired with caramel. However, I decided to up the complexity a little and combine caramel apples with cheesecake! The result: caramel apple cheesecake bars.


These take a little bit of time to make, but they are by no means difficult to do. So if you love cheesecake and caramel apples, give this recipe a try!


Start off making the crust.  Combine 2 cups of flour and 1/2 cup of brown sugar in a medium bowl


Cut in 1 cup of butter (2 sticks)


Blend with a fork until the mixture looks all crumbly :) Preheat the oven to 350*


Press the mixture evenly into a 9x13 baking pan lined with heavy-duty aluminum foil. Bake 15 minutes or until lightly browned, like this! Set it aside to cool


Now start the cheesecake portion! In a large bowl, beat 3 packages of cream cheese with an electric mixer at medium speed until smooth


Add in 1 1/3 cup sugar and mix again. Then add a pinch of salt and 2 tsp vanilla


Now mix in 4 eggs


And 2/3 cup sour cream


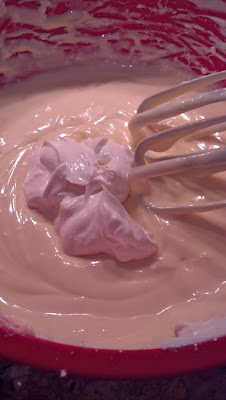
Lastly, blend in 2/3 cup heavy cream. Yummm


Now pour your delicious cheesecake batter on top of the crust


Smooth it out all pretty-like and set aside


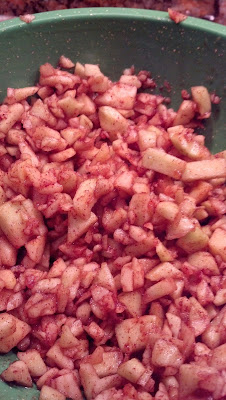
Now make your apple mixture! Dice 3 apples (I used two green and 1 random red).  A food chopper makes this part easy.  Mix them in a medium bowl with 2 tbs brown sugar, 1 tsp cinnamon, and 2 tsp apple pie spice.  Make your own apple pie spice if you want--I just happened to have some on hand that I'm trying to use up


This is what will make your cheesecake healthy ;) 


Now pour the apple mixture evenly over the cheesecake batter. 


If you do this carefully, the apples won't sink


Now make your pecan streusel topping! Mix 3/4 cup flour and 2/3 cup chopped pecans


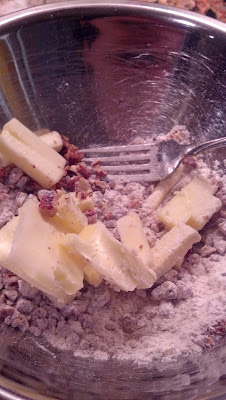
Then blend in 1/4 cup brown sugar and 6 tbs butter, softened


It should look like this


Sprinkle the streusel all over the apples, then throw your pan in the oven at 350* for about 40 minutes, then reduce the temperature to 325 and cook another 25-30 minutes.  When the cheesecake is slightly jiggly in the middle, it is done!


Ta-daa! Let your cheesecake cool for a few hours in the fridge and then cut into bars


Now for the caramel topping--it's quick to do and "makes" the recipe.  Put 1 cup sugar, 1/2 cup heavy cream, 4 tbs butter, and 3 tbs corn syrup in a medium pot.  Simmer on medium heat until a candy thermometer reads right below the soft ball stage.  If you want your caramel less firm and more like ice cream caramel syrup, just simmer the mixture for about 6-7 minutes and it should be good to go!


Cut up the cheesecake into bars, then pour the caramel on. Or pour it on before you cut the bars, but I personally like having dripping caramel down the sides of each bar ;)


...I took a lot of pictures of the caramel pouring stage, obviously


Happy almost-Fall!!


Carmel Apple Cheesecake Bars

Ingredients:

Crust:

2 cups flour
1/2 cup brown sugar
1 cup butter, softened

Cheesecake:

3 (8 oz) packages cream cheese
1 1/3 cup sugar
2 tsp vanilla
Pinch of salt
4 eggs
2/3 cup sour cream
2/3 cup heavy cream

Apple mixture:

3 apples, diced (I used 2 green and 1 red)
2 tbs brown sugar
1 tsp cinnamon
2 tsp apple pie spice

Pecan streusel topping:

3/4 cup flour
2/3 cup chopped pecans
1/4 cup brown sugar
6 tbs butter, softened

Caramel sauce:

1 cup sugar
1/2 cup heavy cream
4 tbs butter
3 tbs corn syrup


Directions:

1) Preheat oven to 350*

2) In a medium bowl, combine flour and brown sugar. Cut in butter with a fork until mixture is crumbly. Line a 9x9 baking pan with tin foil, oil it, and press the mixture evenly into the pan. Bake about 15 minutes until it is lightly browned.

3) In another bowl, beat cream cheese with an electric mixture until smooth. Add in sugar and mix again. Then add salt, vanilla, and eggs. Mix well, then add sour cream and heavy cream, one at a time. Once the mixture is smooth, pour over the warm crust.

4) In a small bowl, stir together diced apples, brown sugar, cinnamon and apple pie spice. Once incorporated, spoon evenly over cream cheesecake mixture.

5) For the pecan streusel topping, combine flour and pecans in another bowl. Then add in sugar and butter and mix until there are coarse crumbs.  Sprinkle the topping over the apples and bake at 350* for about 40 minutes, then reduce temperature to 325* and bake another 25-30 minutes, until the cheesecake is slightly jiggly in the middle. Let cool for a few hours, then slice into bars.

6) For the caramel topping, put 1 cup sugar, 1/2 cup heavy cream, 4 tbs butter, and 3 tbs corn syrup in a medium pot.  Simmer on medium heat until a candy thermometer reads right below the soft ball stage. Then pour over your bars and enjoy!!!


Thursday, June 20, 2013

Sausage Stuffed Raviolis with Gorgonzola Cream Sauce


Do you love pasta?

I love pasta. Thin noodles, thick noodles, wheels, shells, pasta with butter, pasta with sauce...I don't play favorites here. After all, this is America, and all pasta varieties should be treated equally! Making homemade pasta dough is one of the most rewarding yet simplest things to do! Flour, eggs, and salt--that's all there is to it. 

Did I mention I love pasta?

I made a batch of homemade raviolis, and while they were easy to make, they were also extremely time consuming, so don't attempt to make them unless you plan on spending a nice, long afternoon in the kitchen.  Also, I did everything by hand, so unless you have a fancy schmancy pasta maker machine, your arms and back and abs will hurt the next morning. Pasta dough is tough to roll out. Not that I'm complaining. I welcome workouts to sneak into my cooking routine any day!

Part 1: the filling


Let's start with the filling first.  Heat up 1 tbs of olive oil in a large pan, then cook a small, diced yellow onion for a few minutes on medium heat. Add 1/2 tbs minced garlic (I used the kind in a squeeze bottle) and cook another minute or so


Plop. Add 1 1/2 lbs ground Italian sausage.  I ended up having leftover filling mixture, so you could get away with just using 1 lb of meat. But I like leftovers, personally :)


Break up the sausage clumps. I turned down the heat a little so that the sausage wouldn't brown too quickly while doing this part


I added some spices to pump up the Italian flavor. If you have Italian seasoning, use about 1-2 tsp. Since I did not have any, I just added whatever I had in my cupboard haha, so paprika, marjoram, oregano, and some cayenne pepper for a little extra hotness.  

Speaking of marjoram, I have an extreme, slightly illogical hatred toward it. Maybe because I had trouble finding it years ago when making a homemade pizza, I don't know.  Like, it's an extra spice that recipes contain that doesn't seem necessary, but you don't want to leave it out just incase your whole recipe will explode if you don't include everything it lists. As far as I'm concerned, marjoram is like the bitter middle sibling that wants to be like its older sibling oregano, but just isn't all there.  Sorry not sorry marjoram, you are not loved!!!

Anyway...


After your sausage has browned, drain the grease, then put the mixture in a large bowl. Time to add lots of cheese! I did 2 cups of Italian cheese. Trust me, you want it all!

Ok I lied. I actually added 3 cups, which I think is a perfect amount. If you're not a 100% devoted cheese lover, stick with 2


Add 1 cup ricotta cheese. I'm not a huge fan of ricotta, but this amount didn't overwhelm the rest of the mixture, which I like :) Stir everything up and let cool for a bit


Now, having a food processor or blender is really convenient at this point.  If you don't have one, you can still use the meat mixture as is to fill the ravioli dough, but you won't be able to get the right texture unless you can puree it.  I added a handful of basil leaves then pulsed everything together


Mmmmm, doesn't that look tasty?? Ok yes, your filling will look like cat food, but that just means you can pack more of it into your ravioli dough since it's so smooth and compact. Put the mixture aside for now and start your dough

Part 2: the dough


Saw from various sources online that the popular way to make the dough is to combine all the ingredients on a smooth surface like a countertop. Not sure why people don't just use a large bowl since there's less mess, 'cause it worked just fine for me. Dump 5 cups of flour in your large bowl and make a well in the center kinda like this


Add 8 eggs into the center of the well. I have 5 pictured here, because I almost forgot I was making a larger batch, but you get the point


Start by scrambling the eggs together in the center of the well, sprinkle on a little salt, then slowly blend the flour inward


Takes awhile to do, but you'll get there!


Once the dough starts to form and get thick, you'll want to blend the rest of the flour in with your hands


 If your dough is too wet, add more flour. If it's a little on the dry side like mine was, just wet your hands under the faucet, then continue to knead the dough. I did this several times. Continue to knead dough until it is smooth, which can take some time to do


Once the dough is smooth, divide it into 2 balls and wrap both in plastic wrap. Let the dough rest for about 15-20 minutes


Now time for a workout.  Take a chunk off one of your dough balls (it's easier to work with smaller pieces at a time), leaving the dough you're not working with covered with plastic wrap so it doesn't dry out. On a smooth surface, roll out the dough as thin as you can


I used a round cookie cutter with about a 2 inch diameter to make the ravioli cutouts. Reroll the scraps!


Then with a spoon, take a heaping portion of the filling mixture and plop it on one of your dough circles. Don't skimp on the filling, because its malleability will allow quite a bit to fit if you handle the dough right


I found that the best technique to maximize the amount of filling without causing it to squeeze out is to take your top dough circle, pinch it together with the bottom circle, and slowly work your way around pinching to create a pocket. Once you have a pocket like in the picture above, use your finger to gently push the filling down, then add a little more filling. Then seal closed. If the dough is not sticking well, use a little water to help the top and bottom circles meld together. If they are not firmly pinched together, they will come apart once you start to boil them  


This recipe yielded 44 raviolis and took me a few hours to make, so while you're working on them, make sure that the completed ones are covered with a damp paper towel so they don't dry out too much. Having them dry for a little bit before boiling is good, but I wanted to do a final pinch check on them all after completion, which is easier to do if you don't let them dry out


I decided to freeze half the batch. You could just cut the recipe in half if you don't want to make such a large batch, but if you're already putting the effort to make them, might as well make extras to freeze for another meal!!


Once you're ready to get cooking, you can take the paper towel off and let the raviolis dry for 15-20 minutes.  In the meantime, prepare a pot of boiling water. I added some olive oil to the water to help prevent the pasta from sticking. Then toss them in! I did half the batch at a time so they wouldn't be overcrowded


There they go! I've always read that the pasta is done once it rises to the top of the pot, but if your pasta is thicker than normal (which it will be if you rolled it by hand), I recommend letting the raviolis boil an extra minute to make them more tender and less chewy. Only takes a couple minutes per batch--so much quicker when you use fresh instead of dry pasta  


All done! At this point, you could eat them like this, or with some butter. Orrrrrr make the most delicious sauce ever
Part 3: the sauce


Simmer 4 cups of heavy cream in a medium pot for about 35-40 minutes. Be careful that it doesn't boil over, which cream just loooooves to do (I might have fallen victim to that one or two times. Or ten). Once the cream thickens a bit, remove from heat and stir in 1 tbs parsley, 1 tbs garlic powder, 4 ounces gorgonzola cheese crumbles, and 1/4 cup parmesan cheese. Please try this sauce--it is so so SO good


Make sure to serve your raviolis with a big glass of wine ;) I also made caprese skewers and garlic cheese pull-apart bread for the meal.  Might not be a low calorie dinner, but go ahead and splurge--you deserve it!! Yum yum


Sausage Stuffed Raviolis with Gorgonzola Cream Sauce

Ingredients:

For the filling:

1 tbs olive oil
1 yellow onion, diced
1/2 tbs garlic, minced
1-1 1/2 lbs ground Italian sausage
1-2 tsp Italian seasoning
1/2-1 tsp cayenne pepper (optional)
2-3 cups Italian cheese (parmesan, asiago, and romano)
Fresh basil leaves to taste (I used a handful)

For the dough:

5 cups flour
8 eggs
Dash of salt

For the sauce:

4 cups heavy cream
1 tbs dried parsley
1 tbs garlic powder
4 ounces gorgonzola cheese crumbles
1/4 cup parmesan cheese


Directions:

1) Heat oil in a large pan.  Add onion and cook for several minutes on medium heat. Add garlic and cook another couple of minutes. Break up the sausage into the pan. Add Italian seasoning and cayenne pepper, then cook until sausage is browned.

2) Drain grease from pan, then place mixture into a large bowl. Add Italian cheese and ricotta; blend together. Once cool, pulse sausage mixture with basil leaves in a food processor or blender until everything is smooth and compact. Set aside.

3) For dough, place flour in a large bowl and make a well in the center. Add eggs to center of well and scramble. Add a dash of salt on top of eggs. Slowly start incorporating the flour, working it inward, then once dough starts to form, use your hands to blend in the rest of the flour. The dough will be a little tough, so it takes some time. If the dough seems too dry, wet your hands under a faucet, then continue to knead dough until it is smooth.  Form the dough into 2 balls, cover with plastic wrap, and let rest for 15-20 minutes.

4) Use a circle cookie cutter to make the tops and bottoms of your raviolis. Place a spoonful of filling on one circle, then take another circle and pinch it together with the bottom. Stuff those babies! Cover the finished ones with a damp paper towel so they don't start cracking as you're working on the rest.

5) Once the raviolis are complete, take off the damp paper towel and let them dry for about 15-20 minutes prior to boiling. In the meantime, bring a large pot of water to boil. You can add a little olive oil to help prevent sticking, too. Then boil the raviolis in 2 batches. Once they rise to the top of the pot, boil another minute and then they're finished.

6) For the sauce, simmer 4 cups heavy cream 35-40 minutes. Once it has thickened a bit, remove from heat and add parsley, garlic, gorgonzola, and parmesan. Enjoy!!!